There are some people who just love to take snaps wherever they go of which some snaps turn out to be incredible. For the photography lovers converting their personal photos into photo posters is a great way of showcasing their talent. Just think how you would feel if your walls are filled with posters of various snaps that you have taken on vacations? It’s a great idea isn’t it?
Though it is fun to use your personal pictures into photo posters you need to keep a few things in mind while taking the snaps. While taking the pictures always set the camera to the highest possible resolution. The location that you choose should also have enough amount of light to draw eyeballs to the poster. Now that the photos are taken you have to start converting them into the posters. PrintPapa has come up with photo editing and designing software PrintPapa Photo Publisher. With this you can design a photo poster and make it look exactly like you want it to be. The steps are very simple. Let’s try and design a poster using the photo of the majestic Taj Mahal:
Step 1
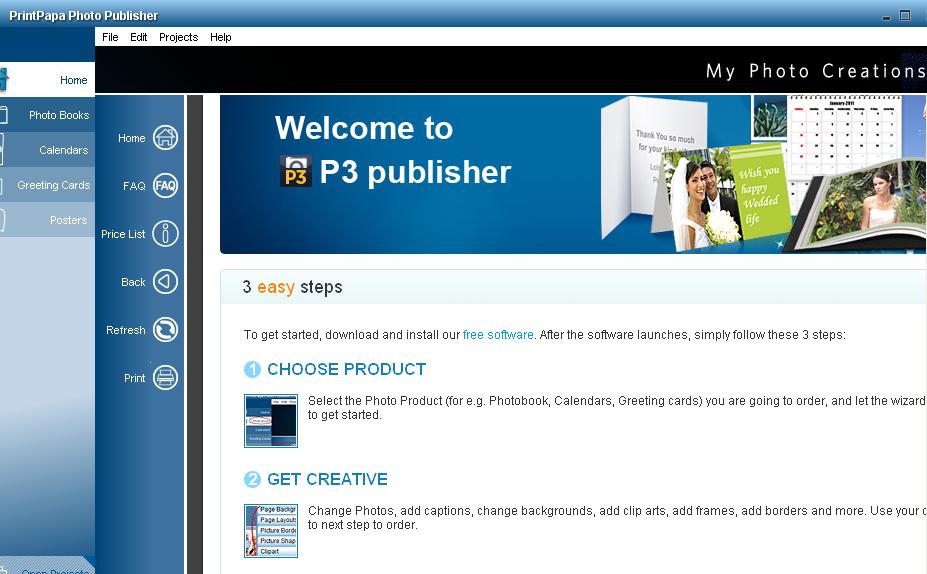
Click to open the downloaded PrintPapa Photo Publisher software present on your desktop or laptop. You will be led to a page carrying a lot of options. You may learn about the Price List or the FAQ. There is also information about the Ordering Process. It is important for you learn the policies of the company before starting the project.
Once you have gone through the content start off with the photo poster designing. Click on “Posters” tab located on the extreme left panel of the software.
Step 2
In the next page you have to select the option “Create New”. When you click on “Create New” another page opens “Cards Wizard”, click on the option on the bottom right “Next” and get to the next step.
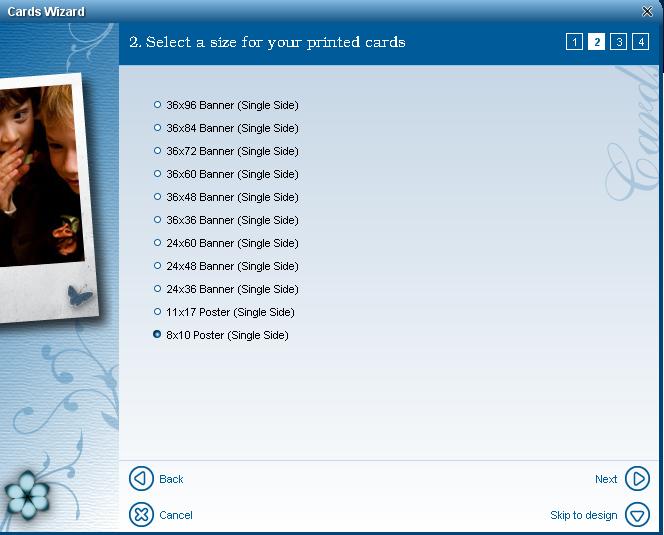
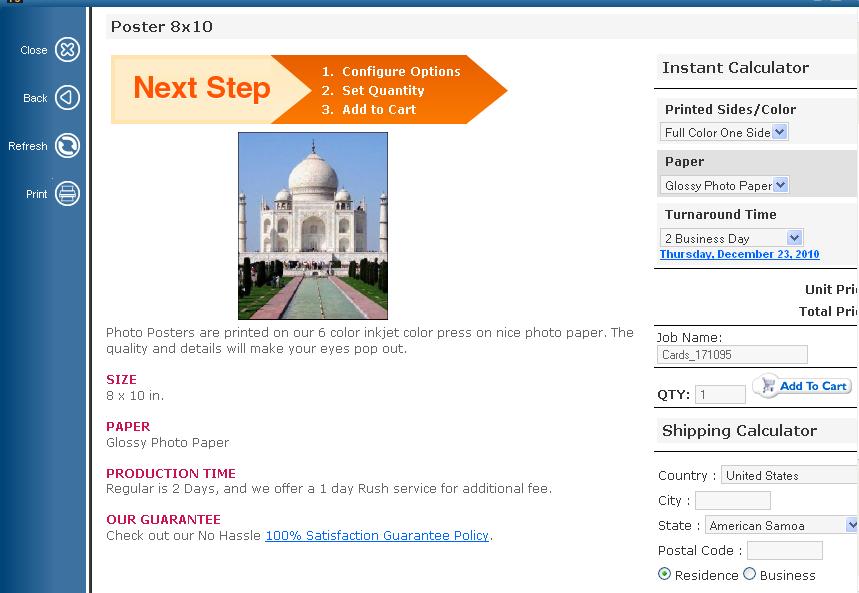
Now you have to select a size for the poster. Choose a size depending on the needs. There are various standard sizes to choose from. Here I am using the minimum limit size (8X10 poster). Once you have selected the right option go ahead and click on “Next”.
Next, you have to select an image for the photo poster so browse through your computer and insert the image you want to display. Here I am using the Taj Mahal snap. After selecting the image click “Next”.

Step 3
Once you have entered the next phase the software will start working with your inserted image and turn it into a printable photo poster. Click on “Finish” to enter the next stage where you can personalize the poster.
Start designing the photo poster using the options available. You can insert object, add a picture frame, write captions, use the zoom options, etc. You can also use the Clipart designs available on the top right panel. Here I will be using the “Holidays” theme for the poster.
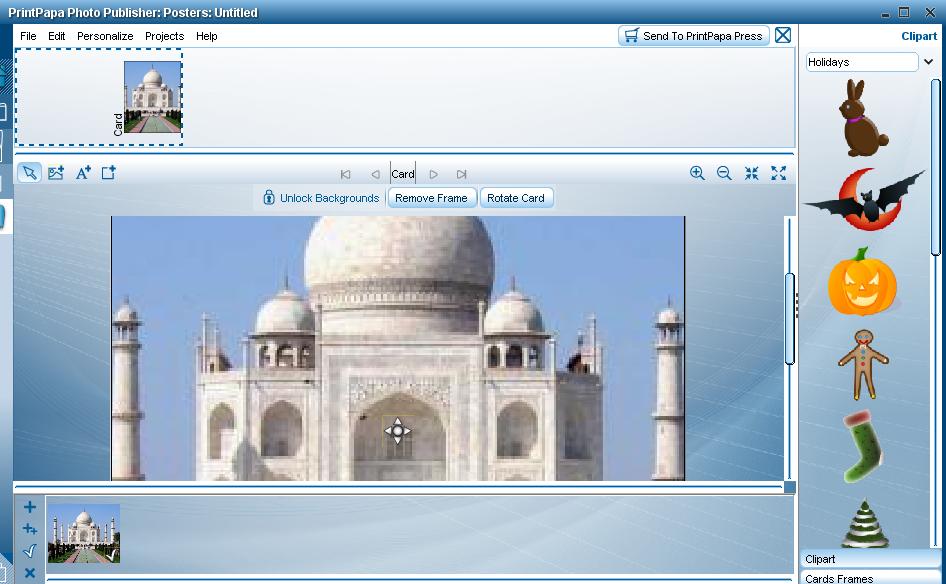
Step 4
Now your poster is ready to be printed. Just give a second look whether you are satisfied with the designs. Once done its time to send it to PrintPapa for printing. On the top right there is the option “Send to PrintPapa Press”, click here. You will be asked for confirmation whether you want to print the project. Click “OK” and your request is sent to PrintPapa. Accept the terms and conditions and click “Continue”.
Select the number of copies, Turnaround time, Paper, Shipping details, etc. and the calculator will immediately tell you the cost you have to pay. Once you have filled in the requisite details your job is done. Just wait to receive the photo poster that you will be proud of.
Just 4 simple steps and you have designed a great looking photo poster. That’s how easy it is with PrintPapa. PrintPapa does not only deal with photo products, they offer other photo products too. At this renowned printing agency you can have photo greetings cards, photo banners, photo books and photo calendars too.