Are you thinking of gifting something unique this holiday season, then photobooks are a great gift idea. Usually you must have thousands of nice photographs stacked in your computer but these go unused. If you want to create a photobook then you can use these photos and make a memorable gift item. Some people scare away from getting the photos printed as the costs incurred to buy a photo printer or to get the photos printed from a printing service provider are high. So why not use one among the hundreds of free software available with the printing agencies? PrintPapa has recently come up with one such software, the PrintPapa Photo Publisher, using which the clients can create a well-designed photobook including some of their unused snaps. There are various designing and personalizing options available in the software so that you can make the gift item meet your exact specifications.
The PrintPapa Photo Publisher is user friendly and you can create the photo book using some very simple steps. First of all download the software onto your desktop or laptop and then follow the below given steps:
Step 1
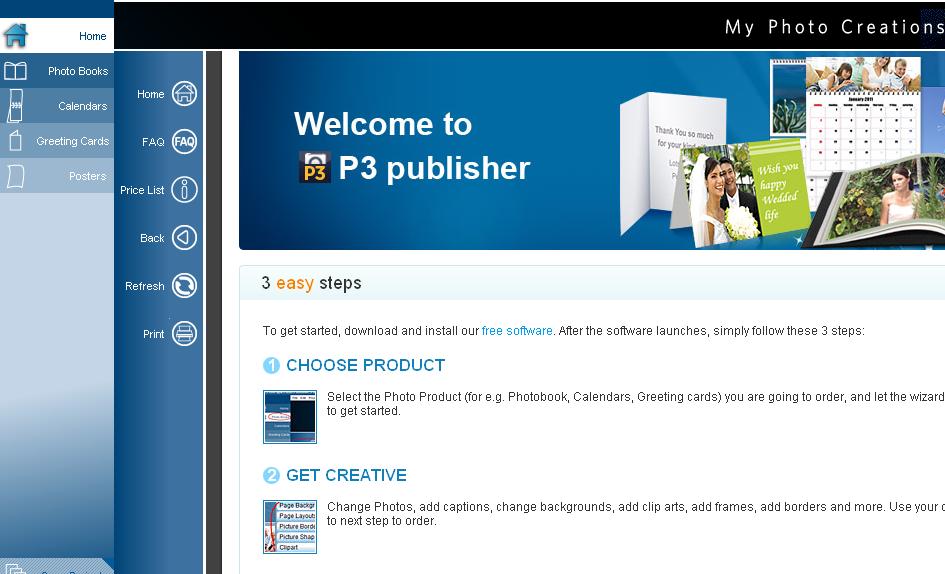
Start by clicking on the downloaded PrintPapa Photo Publisher software. When the software opens there is a page displaying a few options. You can read about various key facets such as the FAQs and Pricing models. If you have already gone through these then get started with the project.
On the left panel of the page there are various photo products mentioned. As we are looking to create a photobook so we will click on “Photo Books”.
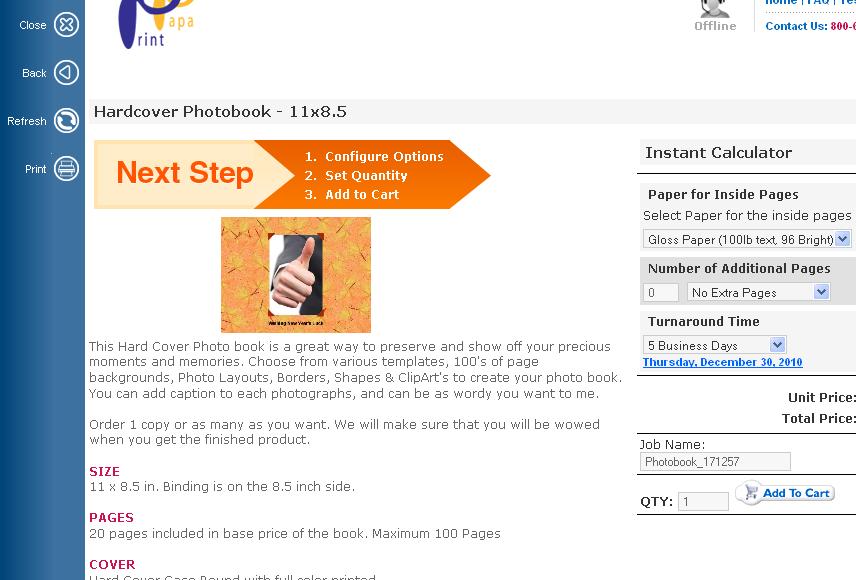
Step 2
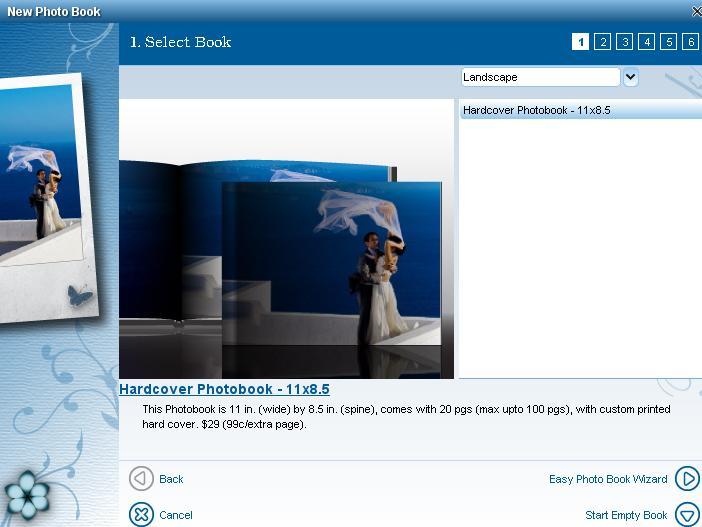
When the next page opens up click on the option “Create New”. You will immediately be taken to a page “Select Book”. Here you have to choose the size for photobook. There are two options available such as Hardcover Photobook 11X8.5 and 8X8. You can also select the categories for the product such as all categories (which will let the software choose) or Landscape and Square, whichever option you feel comfortable with. Here I have selected the option “Landscape” and will settle for the size “Hardcover Photobook – 11X8.5”.
Step 3
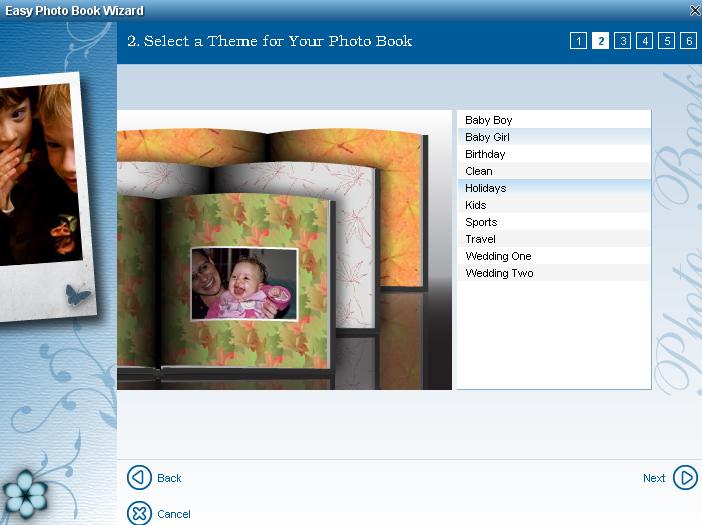
Once you have made your selections click on “Easy Photo Book Wizard”. Select a Theme for your Photo Book next. The themes will depend on the occasion. There are various themes such as Birthday, Holidays, Sports, Travel, etc. Here I will go for the “Holidays” theme. Once completed I will click on “Next” to go through to the next stage.
Step 4
Now go on and select the photos that you want to include in your photobook. It is a good idea to pre-select the photos and keep them in a separate folder. You can select any number of pictures from 21 to 398. Click on “Select Pictures” option. On the left hand panel of the page there are browsing options. Search for the folder where you have kept the photos. Once the pictures in the folder get recognized by the software they will be displayed to you. Click on the photos you want to include by ticking beside them. I will be using 24 pictures for my project. Once the selection is done click on “OK”.
In the next stage you can choose the Cover Picture for your Photobook. The software takes the first picture in the selected list to be the cover photo, so you can alter that by clicking on “Preview Pictures” and dragging the suitable cover photo to the top of the list. You can rearrange other photos in your preferable order too simply by dragging them. Once done click “OK”.

Step 5
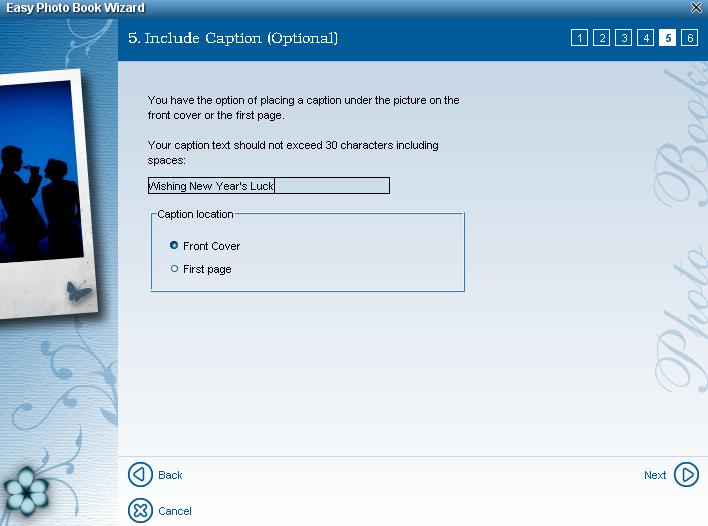
In the next stage you have to give a caption for the photobook that should not exceed 30 characters as also select the caption location (i.e. whether on Front Cover or First page). Once you are through click on “Next”.
Step 6
The PrintPapa Photo Publisher will give you a summary of the preferences you have selected for your photobook creation. Go through it and then click on “Finish” to proceed further.
Now you can design the background of for photos, add frame, add Sepia and black & white touch to them, etc. You may choose the Page Backgrounds, Page Layouts, Page Borders, Picture Shapes, Clipart, etc. The top half of the page shows the arrangement of the photos page wise. So take a minute look.

Step 7
After taking a minute look if you are satisfied with the design and the page arrangement then click on “Send to PrintPapa Press” on top of the page. You will be shown the resolutions of each and every photo, click “Proceed” to get to the next stage. The software will take some time to process your project.
Accept the terms and conditions of the company and then click “Continue”. Wait for some time as all the details will be transferred to PrintPapa for order processing.
Now you have to mention the number of copies you want for the photobook and fill in the expected turnaround time. The calculator will calculate the total cost so that you can instantly know how much you have incurred.
Now just sit back and wait for the photobook to arrive to your doorsteps. It is very easy to create that perfect gift item using the PrintPapa Photo Publisher. There are other photo products also offered by this renowned printing agency such as photo greetings cards, photo posters and banners and photo calendars.